Texturing and Rendering a Wine Bottle: Fine Tuning Textures and Lighting to Add more Realism
Share this video
In this video we’ll be fine tuning our lighting and materials. We’ll start by adjusting the label’s diffuse and reflectance properties to get more of a matte paper look, then add a paper texture bump map to give the label some texture. Next we’ll tweak the reflections on the glass and add a very subtle bump map to make the surface not quite perfect. We finish by tweaking the composition to draw the eye towards the logo, then add depth of field to finish off our scene.
Transcript
In this video, we'll be fine-tuning our lighting and materials,
including adding subtle bump maps to introduce some irregularity to our
object surfaces. Then we'll add depth-of-field to give this render a photo
realistic result. So here's where our render stands right now.
And our goals for this video are going to be to lighten up our label a little bit
more and give it more of a matte paper look, instead of this shiny look.
And then on the bottle glass, we're going to brighten the reflection
on the left, dim down the reflection on the right, and on both materials,
we're going to add a small bump map to introduce some irregularities.
So let's go ahead and do that. To get started, I'm going to turn
on my IRR, and I'm just going to frame up our label. But instead of continuing
to work in the viewport, I'm going to turn off the IRR with ALT+R,
I'm going to come up to my render settings, and in Output,
I'm going to click this Render Region checkbox. And now I'm going to copy
from IRR and that's going to put the bounding box we just made in the viewport
into these values. So I'll turn that off, and hit render, and now in our
picture viewer, we're just getting the label. So now we're going to jump into our
label material, and for now, I'm just going to turn off the
reflection layer. And let's take a look at what our default diffuse layer is doing.
And that looks pretty good, I think it just needs a little bit
more light. So let's go to our Label Light. I'm going to crank this
up to about 215, and hit render. And that's closer to what our logo colors
are supposed to be. So we're going to go with that. And now, close this
for a second. Come back to the label material and turn the refelctions on.
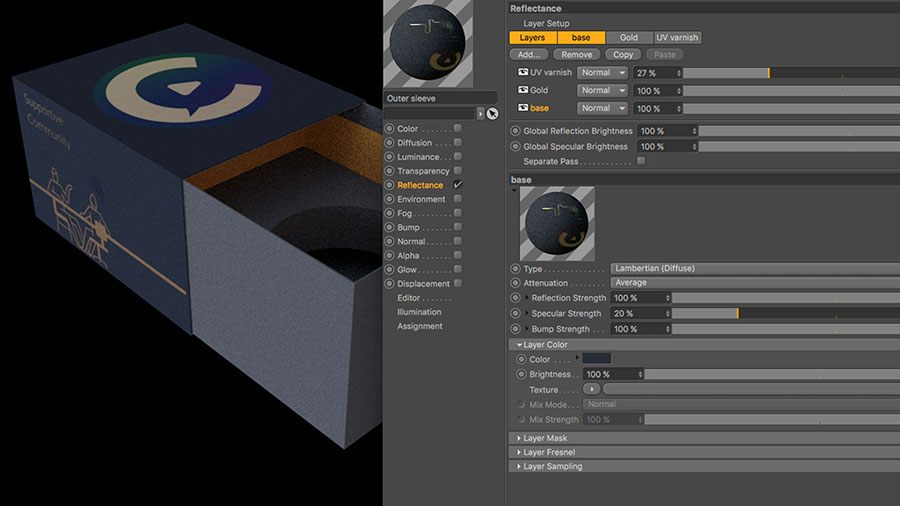
So I think the reflections are still a little bit too shiny.
And they're a little bit too intense. So up here in the reflection layer,
let's crank the roughness up to 50% and see what that looks like.
And I think that roughness gives it that matte look, if only it was just a little
less intense. So I'm going to leave these layer values alone, but down here in the
actual reflection properties, I'm going to turn the Reflection Strength
down to about 16% I think that's the look that I like.
It's still a little grainy because of the low samples, but that will clean up.
So now lets go ahead and add that paper texture bump map to this label.
And before we do that, I want to do a couple things.
I'm going to close our picture viewer for now, and I want to make a close up camera,
so we can get really close to that paper texture and see what we're doing.
And to do that, I'm going to grab our original camera, I'm going to CTRL+drag
a copy. I'm going to look through it, and then I'm just going to crank down here
in the Object tab of the camera. I'm going to crank this Focal Length
way up. And then I'm going to just middle click into frame. And now we're really
close and I think now we can actually just use the IRR to see this.
And since we're so close, the grain's a little better,
but I still want it to be better still. So I'm going to open the Render Settings
with CTRL+B, and in Physical, I'm just going to crank this up to Medium,
just to get rid of some more of that grain. And now you can see it's
clearing up. And that's going to allow us to see this paper texture as we put it in.
So let's grab our label material again, and down here in the Default Diffuse,
there is a Bump Strength property right here. And if you twirl that down,
you'll be tempted to put your texture in this first Texture slot,
but that is not correct. You need to change the mode to Custom Bump Map.
And now we can put a custom texture in this slot. To do that,
open up this fly out, and I'm just going to select a
regular Noise, and now let's watch what happens. So you can see we're getting
little mountains and valleys based off the lightness values of this map.
But that doesn't really look like paper. But I found that if I change,
let's jump into the noise, if I change this from the default Noise,
up to FBM noise, that gave me almost the exact paper texture that I was hoping
for with default values. So I didn't really have to change anything
in here, and it gave me that toothy paper look. But of course,
I tried a bunch of different noises before I found that, so it's not always going
to be this easy. The only thing that I want is just a little bit more intensity,
so I've jumped back up into our layer here. And right here in the Strength
of our custom bump, I'm just going to double that to 40%. And now it's looking
pretty good. So I'm going to look back through our original camera now.
I'm going to turn off IRR. And then in the Output,
I'm going to turn off Render Reaching. I'm going to render the whole thing just
so we can see what it looks like. I think that looks great.
It gives us just a little bit of paper texture to the surface of our label,
it's nice and bright now, and I think we can call that good.
Let's go ahead and move on to the bottle now. So I'm going to go ahead and close
down my picture viewer. Let's grab that bottle material and I'm
going to set up a new render region just for the bottle. And then I'm going to come
into my Render Settings and in the Output. I'm going to turn our Render Reaching back
on and copy the new values and then down in Physical, let's go ahead and put that
back down to Low for right now. Let's take a look at what we have.
Okay. So that's where we're at. I'm going to go ahead and turn
off the Specular. I'm actually going to remove that layer completely and that's
just going to make this simpler because it wasn't really doing anything anyway
for us. And in the Reflection Layer, let's go ahead and boost the Brightness
all the way up to 100 because right now, if I go back to my picture viewer,
this isn't really a bright white even though I've got a really hot light plane
right next to it. And this is why, this brightness value.
So let's see what happens when we turn this all the way up to 100.
Instantly, you can see it looks like chrome. I'll render it so you can see.
And that's definitely not the look that we want. And the reason that's happening is
because there's no Fresnel property in this material. And Fresnel can be found
right down here, and what Fresnel does, is dims the reflections that are facing
the camera and the reflections facing away from the camera are brighter,
which is what happens in real life. So watch what happens if we add a
Dielectric Fresnel, and pick the Glass preset. And render one more time.
You can see, it looks like a wine bottle again, and we had this nice hot,
white reflection that we did not have before. Now all I want to do is I want
to shift this left reflection over. I'm not really happy with the way it's
lining up exactly. With our bottle label. So to do that, I can just grab my light
plane on the left. I'm going to move it straight over. I'm going to grab this
little handle here and fatten it up, and then I'm actually going to use my
rotate tool and just rotate it a little. Now I'm going to grab the object,
and in the Coordinates tab, I'm going to push it straight back in Z.
Let's just see how that looks. That's pretty close.
I'm going to push it just a little bit more. And I think that'll work for me.
I'm happy with the brightness and the position now. Now I want to decrease the
brightness on the right. I feel like these two reflections are
competing with one another, and I just want this to be a supportive
reflection to show off the curve of that bottle. So to drop that,
all we have to do is come into the light plane right material,
and in the Luminance, I'm going to drop it down to about 80 and
just see what it looks like. And I think that's okay. Maybe even 60.
And then I noticed in our last render we're actually getting a little bit
of that reflection in the floor down here. I'm using my IRR to show you.
So I'm just going to move the right light plane over just to get rid of that.
So you can see now that's gone as well. So I'm going to jump back into my Render
Settings and let's turn off our Render Region just so we can see how
it's looking. And that's very close to what I was after. The last thing I want
to add is that bump map to just make this not such a perfect wine bottle shape.
We're going to do the exact same thing. We're going to jump to the
bottle material, and since there's no lambert layer, we're going to use the
reflection layer this time. Still got the same slot right here.
So we'll change the Mode to Custom Bump Map. And I'm going to turn on IRR
in the viewport. So you can see this as we put it in. I'll frame up on the
bottle here. And let's put another noise in and see what happens.
So you instantly you can see our glass becomes pitted. Which is heading the right
direction but I wanted more of a smooth bump, so I'm going to jump into the Noise
and boost the Global Scale to 500%. You can see in our swatch here it got
way bigger. And that looks good. I'm happy with the size
of those distortions, but the strength is way too high.
I'm going to come down here and in our bump section, I can just turn the strength
down to 3% is the number I came up with. And you can barely see it in the IRR,
but I'm going to go ahead and come into Physical, I'm going to turn up to Medium
and our Render Region is off. So I'm going to render one more time so
you can see in better quality what we've just done. So now if you look
at these glass reflections, it's no longer a perfectly straight line
as you go down the wine bottle. It's got just a little bit of distortion
which real glass happens to have as well, so that gives it a little bit
more realism, and then the last thing I want to do to this glass material,
is if we jump over to the Transparency, it's got some green tints to it.
And that's because it was a green tinted white wine bottle. So I'm just going
to flip flop those values to a red tint. So 255, 240, now it's just a touch redder.
And the same thing down here, 17 and 12. I'm just going to flip flop those.
So this is absorption color, and this is transparency color.
Render that one more time. And there we go.
I'm actually a little bit color blind, so I can't even really tell if that
did anything, it was just something that I saw as I was making this,
so I wanted to go ahead and ensure that it was a red tint instead of green.
And now I'm happy with the bottle, and the label. So the next item on my list
is I'm not really happy with where our horizon line is sitting.
I feel like it's drawing your eye, and it's drawing it to the wrong place.
So I want to adjust our camera angle to where our horizon line sits right
underneath the brand name. And that way, if it really is drawing your eye like I
think it is, it's going to draw it to a better place. So that's going to be
pretty easy. I'm going to jump into my four view. I'm going to go ahead and
delete our closeup camera just to make this easier to see. And then in the side
view, the number that I came up with is right now we have -0.5 degrees in pitch,
I went with minus 3 and then we just need to push it up in y. We're just pushing
our camera up to get the same framing but now our horizon line is right
underneath our brand name. So let's go ahead and render that.
And I like that a lot better. I don't know if I've been looking at this
too long, but it just seemed like that line was drawing your eye.
So now if it does, it's pointing you right towards our brand name,
and we're almost done. The last thing I want to do is add some
depth of field which is going to really make this look like a photograph instead
of a 3D render. So I'll close this and open our render settings,
and right here in physical is a depth-of-field checkbox.
So you check that, close your render settings and jump into the foreview.
If you look at our camera the end of the camera cone is where the focal
plane lies. So we want that to be right here on our label. So I'm going to select
the camera, and in the object tab, there's a focused distance field.
And it's actually got a little arrow picker next to it. So I'm just going
to activate that and just click on our label, and you can see it's put the end
of the cone right there on our label. So depth-of-field is set up.
I'm going to leave everything at default. If you want more blur,
you lower this f-stop number, over here in physical.
If you want less blur, you raise it. But let's leave it at default and take a
look and see what we get. And that looks great to me.
I'm pretty happy with the default values. You can play with yours if you like,
but I'm going to leave them as they are, and that's going to get cleaned up even
more when we crank up our render settings. So I think that's going to look great.
The one the that is bothering me is, I feel like our background light is
too hot. So it's kind of drawing my eye towards the background instead of allowing
me to focus on the bottle. So that's a pretty easy fix.
I'm going to grab our background light and I'm going to drop it down to 75%.
And just take one more look. And there we go.
So if we compare, you can see our bottle's more prominent now but the background
vignette is still showing off that contour. And that's exactly what I wanted.
So that's it for this video. All we have left to do is crank our
settings up to give us a nice, smooth, grainless render.
And tell Cinema where to save our files.