Siggraph 2017 Rewind - EJ Hassenfratz: Essential Character Rigging and Animation Workflows in C4D
Share this video
EJ begins by modeling the tentacles, then applies an IK joint chain to the tentacles, with IK dynamics to simulate an underwater feel. EJ then proceeds to show how to convert one of the tentacles to FK to make it wave to the camera. Moving onto the head, EJ shows how to create the mouth expressions using Posemorph and custom made user data. He finishes up by showing how he created animation controls for the octopus's eyes. This presentation is a perfect intro for anyone looking to get into character rigging & animation inside Cinema 4D.
| 03:32 | Modeling Tenticle, making sure mesh has subdivision made for rigging |
|---|---|
| 04:53 | Create Joint chain for IK rig |
| 08:35 | Binding & weighting joints to tenticle's mesh |
| 11:25 | IK Dynamics |
| 18:12 | Transition from IK dynamics to FK dynamics |
| 21:36 | Facial animation using Pose Morph |
| 25:39 | Set up User Data controls for Pose Morph animations |
| 31:58 | Use Spline Shader to texture inside of mouth |
| 36:45 | Setting up eye controls |
| 45:09 | Creating eye blinking rig & controls |
The full tutorial series on creating this Cineversity Cinematic coming soon!
Transcript
Thank you so much. Thank you so much for coming to the MAXON booth.
And hey everyone on the Interwebs. I am EJ Hassenfratz, I'm a freelance animator
and motion graphics dude from Denver, Colorado, and today, I'm going to be
talking about essential character rigging techniques for Cinema 4D.
So if any of you out there have never touched any character rigging at all,
never touched any IK or face rigs or anything like that, or just never got into
character work but always wanted to, I'm going to show you some really super
simple, easy ways to do some really cool rigging and character stuff inside of
Cinema 4D using all the tools. So hopefully by the end of this talk, I'll
open your eyes to how easy it is to just get into the world of rigging and
character stuff. So let me just start off by showing a little bit of the character
work that I've done over the past year or so and show my reel.
♪ [music] ♪
All right. Yeah, if you haven't...if you couldn't see, I like putting cute faces
on things, inanimate objects, that's my deal.
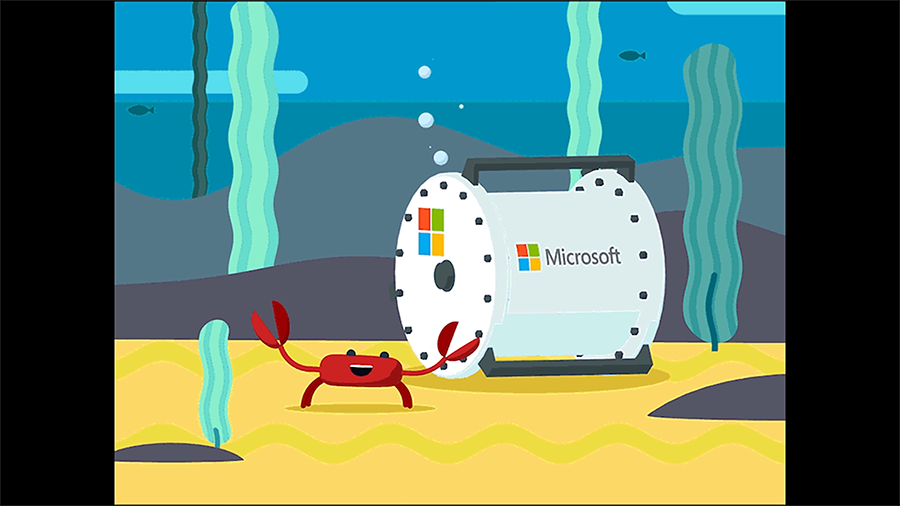
So today, I'm actually going to be breaking down what's going to
be a larger series of tutorials that you're going to find on cineversity.com in
the coming weeks. But here is the actual promo ident that I made for Cineversity.
And basically what I'm going to be doing today is just covering the rigging and
animation of this little octo-character guy.
♪ [music] ♪
So, yeah, thanks. So what I'm going to be doing is
covering this little guy, how I rigged his legs. So this is,
like, very intro level IK kind of stuff, and we're going to get into some IK
dynamics and face rigs. And then the tutorial series is actually going to get
through, like, some of the soft-body dynamics and stuff for some of these
spheres, and then some of the texturing and stuff like that. So,
again, stay tuned to cineversity.com and I'll be covering that and that will be
posted in the coming weeks. All right, so here's my full rig here of my little
octo-dude. And you can see that this is kind of, like, fairly rigged in a way that
I can move this guy around and he looks like he's underwater. It's very automated.
So I'm just going to break everything down to its essence and we're going to start
with the little tentacle. So the first step with rigging with IK and joints and
stuff like that is to make sure that your base mesh has enough subdivisions on it so
you have enough geometry to deform, kind of like using deformers.
You want to make sure that, like, a cube has enough subdivisions so that when you
bend it, it's nice and smooth and it's not, like, chunky. So here's just
basically it's a cube. This is, like, very simple subdivision surface modeling
techniques here. But this is just basically a cube, just made it a little
bit skinny. And then just added a few segments in the Y, so something like that.
And then we can smooth all that out using a subdivision surface.
And let me just hide this tentacle here. Just going to place the cube as a child of
the subdivision surface. And you can see that smoothed everything out,
looking really nice. And then basically what I'm going to do is just make the cube
editable so I can actually access all of, like, the edges and points.
So I'll just make a loop selection by doing U, and that will bring up my
shortcut keys. And then for a loop selection, it's L. And I'll just select
this and, like, just shrink this down. And I'll do the same thing for the top.
And you can see that that was just super simple, that's the leg.
So very easy to model that. And just made that editable and I came up with,
you know, this highly subdivided mesh here. So right now, it's stationary,
we want to actually animate it and be able to bend it. And we're going to use IK for
that. So what IK is, or how IK works, is you need a joint chain to basically build
the skeleton of your character. So we're going to create some joints,
I'm going to use the Joint Tool. And I'm in my front view here. I'm actually going
to turn on snapping here so I can actually snap to some of the vertexes here.
And I'm just going to hit CMD + click and I'll create my first joint.
And then I'll CMD + click and click on the bottom and that will create my first
joint. Now, if I want to create a bunch of other joints in between here,
all I have to do is hit SHIFT + click and I can create a bunch of little baby joints
and basically subdivide that one big joint. So now I have this joint chain
here. We got, what? Seven joints. And you can see that how this is set up by default
is actually forward kinematics, so there's FK and there's IK. Forward kinematics
works like you would animate anything. So if I have this joint and I have all these
children joints, if I rotate this, it's going to affect everything forward in
front of it, or forward as a child of the chain. But inverse kinematics is actually
the opposite way around, where you can actually use this last joint to control
everything behind it. So it's the inverse of the forward. So that's actually what we
want to set up. And that's actually really easy. The only thing you got to do to set
up IK dynamics, or IK setup, is just selecting the first joint,
going to "Character," "Commands," "Create IK Chain." And then what that's going to
do is two things, it's going to create an IK tag here and it's going to create a
goal. And basically the goal is, like, wherever your hand is, like,
it's going to control where your hand is. You can see that this whole rig is kind of
bending. And if we go into our perspective view here and I bend this,
if I want this to actually bend towards the camera, what that's called is the
pole. So the pole basically is, like, where the elbow is pointing to.
So if I bend this and I use this twist, I can actually twist where that bend is
actually moving to. So when you're actually animating a character,
not only do you have to animate, like, where the hand is with the goal,
you also have to animate the pole because that's controlling the angle of where your
elbow is pointing to. So two things, goals and poles. But what I'm actually going to
do before I get too far is on this goal, I'm going to freeze the transformation.
And basically what that does, if I hit "Freeze All," it's going to take all those
values that were in my coordinates and store them down here. So what that means
is I can be screwing around here and moving things all over the place.
But if I'm like, "Oh, I actually wanted to go back to the original position," all I
have to do for that is just zero out everything. Because I stored out all those
parameters down here, I can just zero everything out. And another handy thing to
use that I use all the time, and I actually dock it in my dock up here,
is "Reset PSR." And to do that, I can just hit SHIFT + C to bring up Commander,
and then just type in "Reset PSR." And that will just automatically reset
everything without me having to manually zero everything out in there.
All right, so we got our little bendy arm here. Let's actually do the twist again.
And we'll just put in, like, negative 90 so when it bends, it's bending in the
negative Z towards us.
And again, we can just zero everything out. But you can see that this
isn't actually driving anything. We're just bending some joints here,
but our geometry is just staying stationary. So we need to build a
relationship between our joint chain, or IK chain, and our actual geometry.
So to do that, it's called binding. So we're going to bind those joints to this
geometry. So to bind something, you just need to select the geometry you want to
have deformed by joints. Select all the joints you want included in that
deformation, so all these joints here. Go up to "Character," go to "Commands," and
"Bind." And that's going to do two things, as well. It's going to create this skin
deformer, which basically just includes all the joints and using those joints,
deforms our geometry. And it creates a weight tag, which we'll cover just very
shortly here. So now if I move my goal, you can see... Let me turn off the lines
there. You can see that it's kind of like a Shrek thumb. I don't know.
It looks like a Shrek finger. But you can see that we have this really cool
deformation, we have our joints actually deforming our geometry.
And that's looking really good. The only thing is that it looks like a thumb and
not a, like, smooth tentacle. So what we're going to do is just bend it a little
bit just so we can see how this looks. And I'm going to look at what's actually going
on behind the scenes here. So we have this weight tag. And if I SHIFT and
double-click on this, this is going to bring up our Weight Manager and we're
going to have a fun little rainbow. And you can actually see what the rainbow is,
it's actually the influence of each of these joints and how they're deforming our
tentacle geometry. So this first joint is deforming everything in red,
and you can see that it kind of gradates out and blends into joint number two.
So we have a little bit of orange there and it blends into the influence of joint
one, and then just along down the chain here. But you can see that why we're
getting this kind of, like, pinching or folding is because the gradation is kind
of a little bit chunky. And we can easily smooth that out and blend this,
make a much smoother gradient. And we can do that by just selecting all the joints
that we want to smooth out, going to the Command mode here, and just choosing
"Smooth." And then I'll click "Apply All." And you can see that each time I click
this, it's slowly blending and smoothing out our gradation here,
or our joint influences or joint weights. And I can just click this a bunch of times
until it's pretty nice and smooth. And that's, like, the best weighting
experience ever. Because if anyone has actually done real weighting,
it's a lot more difficult than that. But this is just super easy stuff,
we now have a much smoother bend. And we could probably smooth it a little bit
more. So we can just SHIFT + double-click and just "Apply All" a few more times.
So we got this looking good. Now, what I want to do is be able to set this up so I
actually don't need to set any key frames at all to animate this.
Because you can see in my little first example here if I hit Play and I just move
my head around, it's actually moving and gliding my joint chains there.
So how I did that was using something called IK dynamics. And dynamics,
if you've played with regular dynamics, you know how fun it is.
IK dynamics is also a ton of fun to use and actually really simple to apply to an
object. So I'm going to go into my IK dynamics tab here and I'm just going to
hit "Enable." And then I'm just going to hit Play. And if I move my root,
my joint root around, you're going to see that we have something going on here.
But remember that we actually have this goal and this is still influencing where
the end of our joint chain is in our joint chain setup. So what we actually need to
do for IK to have this kind of flop around freely is go into our IK tag here,
go to the tag, and we're actually going to get rid of that joint goal.
So we're actually not going to use a goal at all, so we'll just clear that out.
But we'll still keep it in our scene because we're actually going to use it
later. And now if I kind of move this around, this isn't constrained by that
joint goal. It can kind of just, whoo, have fun, it's like a little green hot
dog, in our lower viewport. And what we can do now is really start to have fun
with these dynamic settings. So basically, what the strength is is the stiffness of,
the springiness of our dynamics. And if I crank this up pretty good,
you can see it's a little bit more stiff. But what I actually wanted for this is I
wanted to get that nice underwater kind of feel so if I move the tentacle around,
it looks like it's gliding through water. So I'm going to bring the strength fairly
low, so you can see this has a little bit more give there. And then you can up the
drag because of course, like, underwater movement, that's full of drag and
frictional forces. And you can see that is looking a little bit better,
it looks like it's kind of...there's more of that force pushing against it.
One of the main things though that's really going to help get our underwater
look is this gravity. So what gravity does is it's just that pulling force and that's
keeping everything kind of down, but underwater, there's very little gravity.
So what I'm going to do is just, instead of the default value of 9.81, I'll
just do negative 1. And you're going to see a huge change to how this looks now.
And now, this totally looks like this is, you know, floating underwater.
It's an underwater hot dog. And we can now move this around and we can start playing
with some more of these settings here. So the position hold is the desire of the
joints to want to stay in their original position. You can see if we bring down
this percentage down, that we get a little bit of droopiness there,
position-wise. So that's going to try to keep the original position of our joints.
Rotation hold is the same exact thing, where if we bring this down, they're not
going to want to go back to their original rotation. And if we crank that up,
they want to stay at that original rotation, so it stiffens up a little bit.
So let's go ahead and go to this fully setup. I just duplicated those tentacle
setups, I just threw on a couple of vibrate tags here to make my little
octo-guy look really happy and playful. And basically, I'm just going to go into
all of my IK tags here and just mess around with the settings.
Because once I was playing around with some of the settings here,
I wanted to make this look like he was kind of propulsing and looked almost like
a squid or, you know, an octopus where it has that nice tentacle movement where it
propulses itself.
And I actually found that if I play around with these drag and hold
rotation values and if I crank them up to, like, say 80 and let's do 80,
you can see that we have this cool propulsion and there's no key frames
whatsoever. There's absolutely no key frames driving this animation as it stands
right now. We have the vibrate tags, we have IK dynamics, and it's creating this
really cool, like, propulsion look. The other cool thing with position hold is we
can kind of give this a little bit of, like, stretchiness. So you can see once I
move that position hold down, it's, like, a lot more... Because,
you know, octopus, they don't have bones or anything, so they're,
like, super squishy. So if we get this a little bit more squash and stretchy kind
of movement using that position hold and just giving the joints a little bit of
room to, like, grow their position out a little bit. So that was really cool to
play around with. We also have colliders and collisions where you can actually
define what objects you don't want your IK chain to collide into.
So what I would have done is just put all of my joints or all of my tentacle
geometry in the collider so they wouldn't collide into themselves.
Same with the head geometry. So one other really cool thing in IK dynamics is we can
have a lot of control over how the IK dynamics is applied throughout our joint
chain. So say I want no IK dynamics on, like, the first joint chain here.
We have these curves and a spline editor. And basically, what this does is over here
on the left, this is the influence of IK dynamics on the very first joint all the
way over to the right and this is the last joint in our joint chain.
So if I wanted to limit all of the IK dynamics to just the final,
you know, five or six joints, I can just CMD + click here in my spline editor and
just bring down the strength. And you can see a little bit of a difference.
The IK dynamics right under the head is not really doing anything,
but let me just make something super extreme so you can see what's happening.
So this will bring down the strength of the IK dynamics, like, in the
middle of our...and you can definitely see it. Now, it looks like he's got knees or
something like that. So I just brought down the IK dynamics influence on these
joints right here so they're a little bit less affected. And with the IK dynamics,
you can get some really interesting looks by just controlling how the IK dynamics is
applied through your objects. So if you want it to bend a little bit more,
so now we got a lot more, like, propulsion look right there. So IK dynamics,
really, really cool, really, really fun to play around with. So now I'm going to show
you how you can kind of transition from IK dynamics to just regular IK.
So if I wanted at the very end of the little promo here, we have him come up and
give a little, "Hey. What's up?"
So from that, we needed to actually transition from
all the free IK dynamic movement that we had off the top and actually transition to
just regular IK where I can just, again, move that goal. Remember the goal is where
the position of our hand is. And transition into that. So that was really,
really simple to do. So I'm just going to go into here. Here's our goal,
I just made it a lot more visible by just making this null have a circle display.
So I can just easily just find it in the viewport and select it instead of having
to go to my Object Manager. So right now, I have some IK dynamics happening,
right? But what I want to do is have this transition from IK dynamics and be able to
control this again with that goal. So remember in our IK tag, I actually removed
the goal from the goal field, so we actually need to bring that back.
So what I'm going to do is about frame 30, I'm going to set a key frame for that
goal. And I'm also going to set a key frame for the strength. And I'm going to
go just one frame forward and actually just drag and drop that goal into our goal
field. And you're going to see that our leg just kind of snapped.
And that's because the strength of the IK is already at 100%. So we actually don't
want it to just immediately snap and use that goal all of a sudden,
we actually want to bring the strength down to zero. And then once it's using
this goal, we want to actually fade up the strength over time.
So maybe 65 frames will bring that strength back up. So now, we can go and
we'll hit Play and you'll see that they'll snap, and now I can control this with that
goal. But the thing is now, IK dynamics is still acting upon this stuff and some
freaky stuff is happening. But what we're going to do, the moment that we key frame
that goal to be on and use this goal null, we're actually going to key frame the
dynamics. So I'm just going to set a key frame for "Enable," go one frame forward,
and just turn it off. And let's just go back to frame zero here and hit Play.
And you can see now we have no more dynamics, it's just regular IK,
and we can animate a little wave. So super easy stuff to just key frame off,
or key frame using the goal, fading on the strength over time to get a way more
gradual transition from IK to just regular...IK dynamics to regular IK.
And basically what you want to do is when this transitions over,
have that goal somewhere close to where that end of the joint chain is so you
don't have, like, a snapping or anything, it's a lot more of a smooth transition
there. Don't mind that. So here's, like, the end example here where,
especially when you coordinate the key framing of when the IK dynamics ends,
you can get a really smooth transition from the IK to the just regular...or IK
dynamics to regular IK, and you can control with that goal. All right.
So let's move on to face control. So what we're going to do is set up a really cool
way to set up, like, face movements and face expressions using almost,
like...it's called a 2D vector, but I think of it as, like, an Atari joystick.
Where if you, like, push up, it does something. If you push down,
it does something else. So, like, Super Mario, you crouch if you push down.
If you push up, it looks up. Same thing with this guy, I want to make a joystick
control or a 2D vector field that when I push up on it it's going to make it smile,
when I push down on it it's going to make him sad face. So what we're going to do is
set up a bunch of poses using what's called a Pose Morph Tag. And a Pose Morph
Tag is very self-explanatory, it's like the jump to conclusions mat where you just
morph between different poses. Right? So what we're going to do is just bring a
Pose Morph Tag here, and there it is in the Character tags. And actually, Pose
Morph is super powerful, I use it all the time. Probably 90% of the time, I don't
even use it for character-related stuff, it's just such a powerful thing to be able
to morph between a bunch of different poses. So how the Pose Morph works is I
applied it to my spline here and we have all these basic properties and things we
can store, properties we can store from that object. So basically my mouth is just
a sweep along a spline. So if I just go to point mode here, you can see that I can,
like, make this move by just dragging this spline point down. And I just swept a
circle along it, so very simple mouth. And what I'm going to do is just store the
position of the points. Because I want to actually move the points and pose them in
different ways to have him smile, have him frown. So I'm going to go in my Pose
Morph, check on points. And just for the heck of it, in case I want to move the
position of my spline or the scale of my spline, I'm going to store those
parameters as well. And if you actually had a bunch of objects underneath this
that you needed to store, you'd check on hierarchy. So it wouldn't look at the
immediate object that the tag's applied to, but everything underneath.
But we don't need that because we just need this spline. And now we can go into
the tag field, or the tag tab, and now we have all of our poses that we can start
morphing between. So by default, we have our base starting pose,
and then we have this new pose that we can morph into. So this new pose, I'm going to
just rename as "Smile." And let's actually go to our basic tab and rename our Pose
Morph, like, "Mouth Controls." Or "Mouth Poses," let's do "Mouth Poses." And let's
go in here. And now we can just start moving around our points and change this
pose. So let's make his mouth open a little bit here. So something like this.
And scale this out. And we're just moving points here, and move that up a little
bit. So there's our one pose. And you can see that if I go from my base pose to my
smile and I adjust the strength of that influence, we have a talking octopus.
So basically, we have that set up, that morphing is looking good.
Now we can set "Add Pose" and do a whole new pose. So we can do a frown.
And we can just make his...turn his smile to a frown, just move in all these points
here. Make him look really sad. Well, he's got no legs, so he's probably pretty sad
right now. So we'll just move this down. And that looks good. That looks like a
good solid sad face. And you can see that now if I just adjust the strength here,
we have a nice pose, a nice morphing from that base pose to the frown.
So we have our poses, now we need to set up a way to be able to control all this
stuff with a joystick control, those 2D vectors. So let's actually reset the
sliders here. So I'm in animate mode. So if you want to actually animate stuff,
you got to go from edit to animate mode. And we'll just "Reset Sliders" because
right now we have 100% of that smile deformation and 100% of the frown,
so that's why it's kind of, like, a weird face right now. So we'll just bring down
the strength of each of these, or you can just hit "Reset Sliders." And we're going
to set up our little joystick controls, or 2D vector field. So how you set that up is
through user data to set up our 2D vector. So user data is just like...kind of like
expression controls in After Effects where you can set up your own sliders and
checkboxes and all that good stuff. So what we're going to do is go and create
some new user data. And let's just drag this out, we'll delete this,
add a group, and then add some data. And I'll rename this group "Mouth"...
Let's go back into our user data, go to "Data." And let's just redo that again.
Let's do "Add Group." And "Mouth Control." Add some data. And what we want to do is
the data type we want to use is vector and the interface is going to be a 2D vector
field. So you can see we have this 2D vector field and you can see that this is
kind of like a joystick where you can move this little cursor here up and down,
left and right, and all over the place, like a joystick controller.
And the unit we want to use is actually percent because our Pose Morph is done by
percentage of strength. So we'll just change that unit from "Real" to "Percent."
So you now see we have, like, 100% and 100%. And for this, like,
joystick control to start at the middle, we'll just change the X and the Y to 50%
and 50% and that will be dead center. And let's just rename this "Mouth Control" and
hit "OK." So now when we go to our actual mouth spline, we have this new data field,
or our use data field, with our mouth control all set up. So now, all we need to
do is set up a relationship between this 2D vector field and our Pose Morph.
And the object we use for that is called a driver. So we're going to want to use that
2D vector field to drive our Pose Morph. So if you see in our little driver tag
setup, it's almost like we have joystick points and we can actually define
different things and different poses for each of these little points.
So, like, up, down, left, right, and all around. And so we can set the driving
parameter and that's going to be our user data mouth control. So I'm going to bring
that in, and then the driven object is going to be all of our poses from our Pose
Morph. So I'm going to drag and drop our mouth poses into the driven object here.
And since we only need to go up and down for smile and sad face,
we are going to actually remove the resolution in the X. So if I bring this
down to just one resolution in the X, you can see we have three positions.
So we have the middle position, the up, and the down. So we can actually define
what the up and the down is by just clicking on each point. So the middle is
just going to be the default pose, so our default pose. And then the top one,
I'm going to select the top dot. And so whenever we move our data vector field up,
I want that to actually smile. So I'm going to set that smile pose from our Pose
Morph for that movement. And then for the bottom, I'm going to set that parameter to
the frown pose. So now if we did this correctly, we can go into our mouth
controls. And what I'm actually going to do is just drag and drop this into my
viewport here. And let's go full screen. And I'm just going to right-click so this
is going to show always, and we'll lock it to this view. And you can see this is just
a way easier way to control everything without having to actually select it.
So if I did this right, we should be able to animate this guy.
And you can totally animate this 2D vector field. So like I said,
it's like a joystick control. Where if I go up, it smiles and goes to the smile
pose. And if I go down, go to the frowny pose. Now we could totally expand on this.
And I just did two poses and I'm just controlling the mouth, but I could control
the eyes and the, like... If you actually had, like, a real character with,
like, an actual face and mouth that's actual geometry and not just a sweep nurb,
you can just, like, use a Smear Tool or whatever like that and get a lot of full
expressions, like with the eyes and frowns and eyebrows and stuff,
all controlled by this kind of thing. Because I'm just controlling the mouth at
this point. So let's actually move on to this other example where I set up a lot
more poses. So I'm just going to go into my Pose Morph object here.
And you can see all the different poses I have going on this guy.
So I have, like, the open smile. I have, like, when it goes to the left,
so he's like, "Hmm." And then same thing for the right. He's like,
"Ooh." And then just a typical smile. And then the cool thing about Pose Morphs is
that you can actually go beyond 100%. So he could be super stoked,
or just really sad. So I can even go negative here and make a frown.
Because it's all based on that movement of those points. And you can go positive or
negative based on the actual strength value. So then we have a frowny face to
the left and a frowny face to the right. So all those poses. And let's just reset.
And then go to our little 2D vector field here. And you can see what's actually
happening behind the scenes, is all these different strengths are influencing at
different times depending on what area of my little driver field is here.
So you can see that instead of just the up and down, I have a resolution of three and
three in all of these poses set. So you could really go nuts with a lot of
different poses being controlled by this driver tag and the 2D vector.
So what I want to do now is actually set up, like, the inside of his mouth color.
Because right now if I render this, it's just green behind it.
So I actually want to create his mouth using this actual mouth spline and use a
texture to be able to follow along with all the spline deformation there.
So we'll use this spline to create a texture. And we can do that super easy by
creating what is a... Let me just go, let's delete that. What we're going to do
is I'm just going to apply this, like, pink material for the mouth,
and I'll apply that to the head. And then what I'm going to do is use that spline as
an alpha channel to kind of knock out this color. And what I'll do is go into my
alpha channel here. And to be able to use splines as textures, we're going to use a
spline shader. So we'll just bring in the old spline shader here.
And by default, you can see we just have text on this dude's face.
And you can see what's going on behind the scenes with the spline shader here.
The great thing about the spline shader is if you wanted to use text as a material,
we can just simply, you know, "Siggraph," type that in there, and you can see that
will update. And then all we got to do is, like, just scale this down so it actually
fits in our little preview viewport here. And we have a line width,
width is, like, a line thickness or a stroke thickness. We'll just bring that
down to zero, and then we'll just fill this. We'll use "Fill Color," and we'll
just load up a color channel here so we can actually fill that in.
You can see we got "Siggraph" there. It's actually chopped off at the bottom because
we need to center this a little bit more in our viewport. But you can see that we
can basically apply text as a material. And the great part about doing spline
shaders is I could zoom in super close here and it's super sharp,
like really, really sharp. So if you use text as a material or logos or anything
like that, it's so much easier to have it a little bit more easy to use using the
spline shader because you don't need to jump back into Photoshop.
Maybe up-res it, make it a bigger resolution, then come back into Cinema 4D
to reapply that text texture. But we're not using text, we're using an actual
spline for the mouth. So I'm going to drag and drop my mouth spline in here into the
spline field. And you can see that we have our little mouth, and right now it's on
the top of his head. All we need to do is just give this a value of,
like, 50 and 50, and that should center our mouth, little mouth spline,
in our spline shader. And now we can just go to our head and just adjust how this is
mapped on our geometry. So what I'll do is go into my texture mode and let's actually
change this mapping from UVW projection to just flat. And then what I'll do is you
can see his mouth is really huge and you can actually see the flat projection plane
here. So if I actually want to edit this, I can just hit T to scale this down.
You're going to notice that this actually scales. It's not uniform at all,
to actually uniform scale, I'm going to click on this axis, axis modification, and
this will actually scale it down from the center. So nice little handy tip there.
And then we'll just move this down and position this. Because I used to be the
guy that would be farting around the coordinates or the offsets and just trying
to figure out what's going on, but this is a much easier visual way to position your
textures here. So, again, if I could scale this down a little bit more.
And you can see that it's using this spline to add that shape or that texture
on to our object through the alpha channel. So now the cool thing is,
remember, we have the Pose Morph morphing and moving this spline.
So if I kind of adjust this and render, you can see that it actually moved.
And if I have his mouth open here, so there we go, you can see that it now
opens as well. So you can see that that's actually not updating in our viewport
here. So if I move around, you can still see that even though it renders fine.
What you want to do is actually go into our mouth control here,
or mouth texture, go into editor, and just make sure "Animate Preview" is on.
And you can actually hit Play and this will actually update. You can see it kind
of snap a little bit like that. So just keep that in mind when you're doing that
kind of stuff. So that is mouth controls and using an actual spline to use as a
texture and being driven by that whole Pose Morph 2D vector field rig.
So now we're actually going to go to eye controls. And we're going to give...
Or actually no. Yeah, yeah, we're doing eye controls. Because he's got no eyes,
so we need to make some eye controls. So what I'm going to do is just rebuild the
eye from scratch to show you how easy it is to actually build a whole entire eye
rig. So what I'm going to do is just grab a sphere. And it's way too big,
so we'll just bring that down. And just move it forward. And we'll just position
this here. And let's apply a texture to this guy. And by the way,
R19, the viewport is really beautiful. You can actually see an HDR reflection in your
viewport now, which is really cool. And we even have depth of field.
So if I had depth of field in this scene, you'd actually see it in the viewport.
Hopefully someone in some of their presentations will show it a little later,
but it's just, like, a gorgeous viewport in R19. So let's go ahead and we'll make
this the eye sphere. And I'm just going to CMD + click and drag and duplicate this
eye, and we'll make this the pupil. And I'll place a black texture on this.
And you're really going to see that HDR reflection on this guy.
So even if you don't have an HDR loaded, it's going to use a default texture.
And I believe this is, like, outside the MAXON offices in Germany.
A nice little park, I guess. Park scene. So what I'm going to do is just scale this
Related

Ninja Character Rig
NAB 2017 Rewind - EJ Hassenfratz: 3D: How to Make Cinema 4D an Invaluable Part of Your 2D Workflow
NAB 2015 Rewind - EJ Hassenfratz, Eyedesyn: Adding C4D to your 2D Workflow with Sketch and Toon