Getting Started with CINEMA 4D R15, Part 05: Introduction to Transforms (Move, Scale, and Rotate)
Share this video
In this video you will learn how to transform objects with the Move, Scale and Rotate tools as well as the Coordinates Manager. You’ll also learn the difference between the Object and Model mode, and when to use each when scaling your object.
Transcript
In this video you'll learn the second part of object interaction
which is the transform.
Now, unfortunately this is nowhere near as cool as it sounds,
but it is one of those fundamental operations when working in 3D.
A transform in the context of the 3D application
is any sort of movement, rotation, or scale performed on an object.
So "transform" simply means a change from one position scale or rotation
to a new position scale or rotation.
This can be overtime in the case of animation or as the user interaction.
So how do you transform an object than?
That is where the transform tools or more simply the move, scale, and rotate tools come into play.
When an object is selected and any of the transform tools are active
you'll be able to see its axis were presented either by handles or bands
these handles do a few things.
First, they can show you the objects a local orientation.
Second, they let you know which mode you're in, and
Third, they let you restrict a transform to a single axis.
When the move tool is selected you'll see cones at the ends of each axis handle
while the scale tool has cubes.
Finally, the rotate tool gives you access bands that circle the object around each axis.
Now, each handle or band is also colored to match the axis that it represents.
In this case, red, green, and blue or X, Y, and Z.
Regardless of which transform tool is active
when you move the cursor over handle or band it will highlight that handle or band.
And, if you click & drag the handle the transform will be applied along or around that axis.
So, by clicking and dragging the green axis handle you'll move the object along the Y axis,
or in the world of cinema 4D up and down.
Next, clicking and dragging the red axis handle allows you to move the object along the X axis,
or left and right.
Finally, clicking and dragging the blue handle allows you to move the object along the Z axis,
or front to back.
Now, as you are dragging these handles keep an eye on the coordinate manager
as this is going to show you the updated values as you change them.
It will also be helpful to relate the movement's you make in the view port to this manager
as will help you get a better understanding of the space are working in.
The scale tool seems like the obvious tool to check and next
at least if you read the icons left to right.
But, because its behavior changes based on the mode and object type it's on to the rotate tool instead.
With the rotate tool you'll click and drag on the axis band that you want to rotate around.
This means that if you click and drag the green axis band you rotate the object around the Y axis.
If you click and drag the red axis band you rotate around the X axis
and if you click and drag the blue axis band you rotate around the Z axis.
Now, if you are looking at the coordinate manager there's a column for rotations but it doesn't have a X, Y, and Z.
Instead all you can see is "H" for heading, "P" for pitch, and "B" for bank.
Although these terms come from aeronautics and play fairly important role in how cinema functions
for the most part you can ignore them.
They are really just another way of representing rotations in space.
The simple breakdown is this, the heading or "H" represents a rotation around the Y axis
or rotation that follows the green axis band.
The pitch or "P" is the rotation around the X axis or rotation that follows the red axis band.
and finally you have the bank or "B" which represents the rotation around the Z axis
or a rotation that follows the blue axis band.
In short, just remember "H" is a rotation around the Y axis,
"P" is a rotation around the X axis,
and "B" is a rotation around the Z axis.
This will take some time getting used to but it's worth the effort,
and if you want to cheat,
you can always just look at the coordinate manager to see which attribute you're changing.
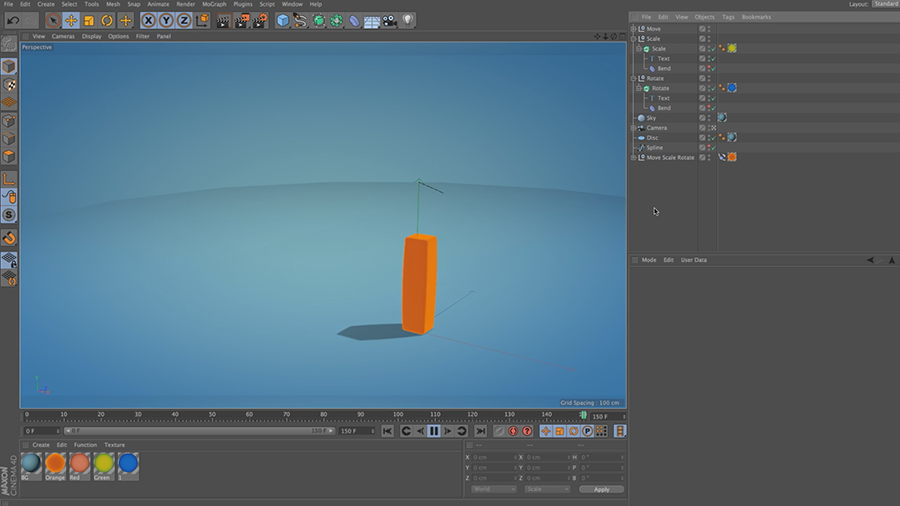
Finally, there's the scale tool,
and this one is a bit different because how it functions can change a lot based on the circumstances.
The first time most people try to scale a primitive object they click and drag an axis handle
expecting it to scale along that axis.
Instead, the whole object scales up not what was expected that also not a mistake.
Now, there are actually two different things happening here.
One, is part of how primitive objects function
the other is the value that is being changed.
So, in this example ignore for a moment that the cube is scaling on all axes.
Objects inside cinema has two properties that define their visual quote unquote "size".
First, there's an actual size
this is an absolute defined either by internal calculation in the case of a primitive
or based on the actual points located in space.
In the case of something like a polygon object .
Next, there is a scale and this is a multiplier used to adjust the visual size relative to the actual size.
First, take a look at the current mode selected on the left hand palette
this should currently be the model mode.
The icon also lets you know there's a flyout pallet here.
If you click and hold the icon you'll find two different modes,
the model mode and object mode.
Now, both of these modes let you affect an object as a whole,
and when performing a move or rotation they function the same.
So this leaves the scale tool.
When selecting one of these modes your choosing whether you will transform the size of an object
In the case the model mode or the scale in the case of the object mode.
Take the primitive cube for example.
In this case when you scale the cube well and object mode
your affecting the size parameters of the cube itself.
This can be seen if you take a look at the cubes attributes in the attribute manager.
Now, this means if you were to try and animate the scaling you have to animate the size.
Which means a simple scale would have to be from zero to 300 are 200 or whatever size you wanted your cube
and perhaps more problematic is it since the original value isn't stored anywhere
if you want to return to a specific value
you have to make a note of that value yourself.
Now, this isn't to say that animating these attributes is totally wrong
their many cases when you would want to animate the size of the parametric object.
Now, the second odd thing about most people's first experience with scaling is one of primitive object only scales uniformly
In the case of using primitive objects the object itself is just a point in space
it doesn't have any size to speak of.
So it just scales the math that is being done under the hood to create the primitive object.
This is something that is unique to primitive objects.
If the same object is made editable
then you can scale a long as selected axis,
but this is transforming the actual points in the object.
While this can be handy it is also destructive
so either be confident of your plan,
save incremental, or create duplicates of your object along the way.
This way you'll always have something to reference back to.
So, it might be handy for that not to happen right?
Well, if you want to change the visual size of the object,
but still want to have the original size stored somewhere
than this is where the objects scale comes in.
With an object selected you may have noticed that in the attribute manager there's a coordinate tab.
Now this tab is a little different than the coordinate manager.
First you are always shown a local position and rotation
and second your shown the objects scale not its size.
The scale in this context is a multiplier on the objects actual size that means
that if the size X in the object tab is 200 the scale is going to multiply that by one
and then display the results.
If you set the scale X to 0.5
that means it is going to multiply the size acts by 0.5 before displaying the results.
While this changes the cube visually
if you look back of the object tab you can see that the size X is still set to 200.
Select before if you wanted to scale this up from zero
you enter in a value of zero into each field and you can make the object disappear
but then simply entering a value of one returns the object to its normal size.
Now to animate this you just need to add a couple key frames.
Now, this may seem like some extra legwork for basic scaling
but fortunately this is where the object mode comes into play
as it allows you to change the scale multiplier directly while using the scale tool.
So, how do you choose when to use each mode.
Perhaps the simplest way of understanding is to think and my modeling or am I animating?
When you are modeling or creating your scene
you usually want to affect the actual size of your objects.
So you use the model mode which changes the actual size of the object.
When animating you often want to affect the scale modifier.
So that you can easily return to the actual size of an object.
So in this case, you would use the object mode.
Now, let's take a look at what happens when you scale a hierarchy using the two different modes.
For this a simple generator setup like the sweep provides a pretty good example
as it gives you a mix of a generator, a circle spine object which is a type of primitive object
and a spline which is a type of point object.
Now, in model mode if you click and drag on each of the various axes to scale
you'll get different results
but the one constant is it the primitive spline is always scaling uniformly.
Remember this uniform scale is inherent to how all primitive objects function.
No matter which axis you scale it always scales uniformly
and if you take a look at the attribute manager
you can see that every time you scale the sweep your affecting the radius of the circle.
Next, the spline object used as a guide is a point object.
That means it's points actually exist in the scene
and in this case they can be scaled
either on the Y axis or on the X axis.
but since there isn't actually any depth to the object
there's no apparent change along the Z axis.
Remember zero multiplied by anything is still zero.
So, when you scale the generator in model mode it is trying to apply the same transform to the children of the sweep
and each child is respecting the limitations inherent to its object type.
If you switch to object mode and try the same thing
you are affecting the scale of the sweep.
In this case, you can scale of objects is expected
as in everything scales together or along a single axis.
Now, there are some big differences here.
When using the model tool the radius of the circle spline was changed
but in this case it has remained the same
and if you check the coordinate tab on the circle spline you can see if a scale has been applied.
In this case, it's still set to one
but the circle spline is definitely larger so this only leaves the sweep.
Checking the coordinate tab for the sweep shows that the scale has changed.
So, this means that the scale of the parent or root object is passed down to its children automatically
This is unlike scaling in model mode which affected the children directly.
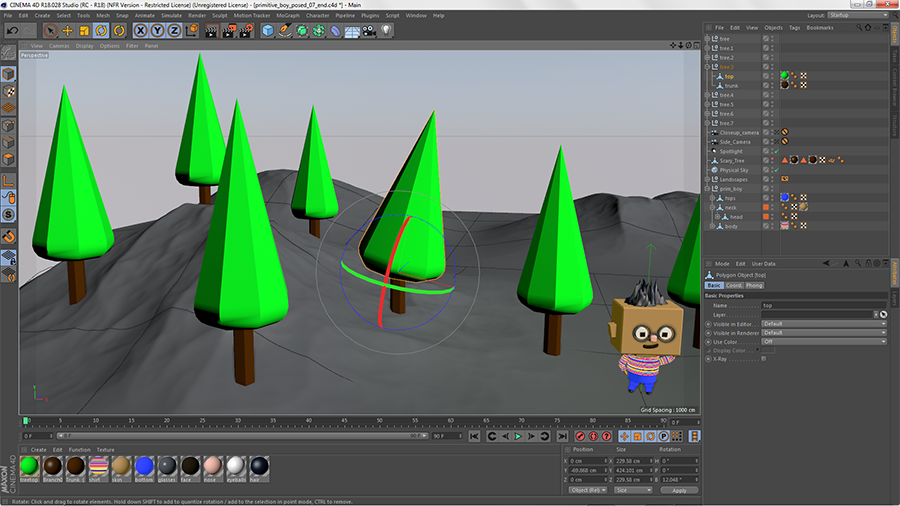
As another quick example before you move on
if you have something even simpler like a polygon cube under an null
if you scale the null 50%
and then remove the cube from the hierarchy you can see that the cube doesn't change.
This is because the scale is applied to the child directly.
Now, if you scale the null using object mode
then remove the cube again the cube stays the same visual size
but if you look at the scale on the cube you can see that it has inherited the scale you applied to the parent.
This is done so that when you remove the cube from a scaled hierarchy it doesn't change size suddenly
Now, take some time to work through this stuff
try to get a feeling for how different objects are affected by the scale tool in the different modes.
If you want a project to work with
just open up the "navigation figure c01" that was used in the previous videos
and once you feel ready you can precede to the next video in the series.
このビデオはオブジェクトの取り扱いに関する解説で、
操作についてです。
残念ながらカッコいいテクニック というわけではありません。
しかし、3Dでの作業における基本操作になります。
3Dアプリケーションにおける操作とは、
だいたいオブジェクトを移動、 回転、スケールさせることです。
「操作」は、位置、スケール、角度を
新しい位置、スケール、角度に 変えることを意味します。
アニメーションのために行ったり、 ユーザーの求める状態にします。
それではどのようにオブジェクトを 操作するのでしょうか?
操作ツールはここにあり、シンプルな移動、 スケール、回転ツールで操作できます。
オブジェクトが選択され、 いずれかの操作ツールがアクティブであれば、
ハンドルや回転バンドとして軸が確認できます。
ハンドルには、意味や機能があります。
まず、オブジェクトのローカルの向きがわかります。
次に、どのモードになっているか確認できます。
3つ目に、操作を一軸の制限できます。
移動ツールを選択すると、 軸ハンドルの先端が円錐になっており、
スケールツールは立方体、
回転ツールは、軸ごとに円状のバンドになっています。
各ハンドルやバンドには、 軸ごとに色分けされています。
この場合、赤、緑、青が、それぞれX、Y、Zです。
どの操作ツールを選んでいても
カーソルをハンドルやバンドのところに持って行くと、 各軸がハイライトします。
ハンドルをドラッグすると、 その軸に沿って操作できます。
緑の軸のハンドルをドラッグすれば、 オブジェクトはY軸に沿って移動します。
もしくは、Cinema 4Dの世界の中で上下します。
赤い軸をドラッグすると、 オブジェクトはX軸に沿って移動します。
つまり左右に動きます。
青い軸をドラッグすると オブジェクトはZ軸に沿って移動します。
前後に動きます。
ハンドルを動かしている時に、 座標マネージャを見てください。
動きに合わせて各値が更新されているのがわかります。
ビューポートとマネージャが連動しているので、 とても便利です。
また、空間のどこで作業しているかも 理解しやすくなります。
移動ツールの右隣りにあるのが、 スケールツールです。
モードとオブジェクトタイプにより働きが異なるので、 先に回転ツールを紹介します。
回転ツールを選択して、回転させたい軸バンドを ドラッグします。
緑の軸バンドをドラックすると、 オブジェクトはY軸を中心に回転します。
赤い軸バンドをドラッグすると、 オブジェクトはX軸を中心に回転します。
青の軸バンドをドラッグすると、 オブジェクトはZ軸を中心に回転します。
座標マネージャを見ると角度に関する列がありますが、 XYZでありません。
かわりに、H(ヘディング)、P(ピッチ)、 B(バンク)と表示されています。
この呼び方は、航空学からきていて 重要な役割を果たしますが、
Cinema 4Dの機能では、ほとんどの場合無視できます。
空間での角度を表現する別の方法があります。
ヘディングもしくは「H」と表現されている場合は、 Y軸に沿った回転で、
緑の軸バンドを沿った回転になります。
ピッチもしくは「P」は、X軸に沿った回転で、 赤の軸バンドを沿った回転になります。
バンクもしくは「B」は、Z軸に沿った回転で、
青の軸バンドを沿った回転になります。
「H」は、Y軸の回転。
「P」は、X軸の回転。
「B」は、Z軸の回転です。
なれるまで時間がかかると思いますが、 覚える価値はあります。
よくわからない時ときは、
座標マネージャを見て、 どの値が変更されたか確認してください。
最後にスケールツールです。
これは少し異なります。 というのも、状況によって機能が変わるからです。
ほとんどの方が最初にプリミティブオブジェクトの軸を
ドラッグして一つの軸に沿って スケールさせようとして、
予想外に全体がスケールされますが、 これは間違いではありません。
ここでは、2つのことが起こっています。
一つはプリミティブオブジェクトの機能に関する部分で
もう一つは、変更される値についてです。
この例では、立方体はすべての軸が スケールしているわけではありません。
オブジェクトはCinema 4Dの中では、 サイズには2つのパラメータがあります。
1つは実際のサイズです。
ここで絶対的に定義されているのは プリミティブの内部計算もしくは
空間でのポイント位置を 元にしたものになります。
ポリゴンオブジェクトと似ています。
スケールは、実際のサイズの倍率を変えて 見た目の大きさを調整します。
左のパレットで選択されている 現在のモードを確認してください。
おそらくモデルモードになっているはずです。
このアイコンパレットは、 ポップアップします。
アイコンを押したままにすると、 2つのモードがあることを確認できます。
モデルモードとオブジェクトモードです。
それぞれのモードは、 オブジェクト全体に影響して
移動と回転は、 どちらのモードでも同じ働きをします。
スケールツールだけが異なります。
選択モードによる違いはモデルモードでは オブジェクトのサイズが変更され
オブジェクトモードでは、スケールされます。
プリミティブの立方体で試してみましょう。
オブジェクトモードで 立方体をスケールしてみると、
立方体のサイズのパラメータが 変更されます。
その状態は、属性マネージャで 立方体の属性を見ると確認できます。
あなたがスケールのアニメーションのつもりでも サイズのアニメーションになっています。
つまり0から300や200にスケールしたつもりでも 立方体のサイズそのものが変わってしまいます。
しかも、元の立方体のサイズはどこにも 保持されていないので、困る場合があるでしょう。
もし、特定の値を戻りたい場合は、
その値を自分でどこかにメモしておく必要があります。
こうした属性をアニメーションさせるのが 完全に間違いというは訳ではありません。
もちろん、パラメトリックオブジェクトのサイズを アニメーションさせたいケースも十分あると思います。
残る方法ですが、多くの方が最初に行うスケールは、 プリミティブを均等にスケールすることだと思います。
プリミティブオブジェクトを使う場合、 オブジェクトそのものは空間での座標点しかなく、
サイズは持っていません。
スケールの計算を行ってから、プリミティブ オブジェクトを内部で後から生成しています。
これがプリミティブオブジェクトが 特殊な理由の1つです。
もし、同じオブジェクトを編集可能にすると
選択した軸にそってスケールできます。
しかしこれは、オブジェクトの持っている 実際のポイントを変形させています。
この操作も非可逆なので
作業は計画的に行うようにしたり、
差分を保存したり、 作業途中に複製を作るなどしてください。
この場合は、下絵などを背景において 作業する場合にいいでしょう。
うまく行かなかった場合に便利です。
オブジェクトの見た目のサイズを変更しつつ、
元のサイズを保持したい場合は、
オブジェクトスケールを使います。
オブジェクトを選択して、 属性マネージャの座標タブに注目してください。
このタブは、座標マネージャとは少し異なります。
1つ目は、常にローカルの位置と角度が 表示されています。
2つ目は、オブジェクトのサイズではなく、 スケールが表示されています。
このスケールの意味は、オブジェクトの 実際のサイズに対する倍率になります。
オブジェクタブのサイズ.Xが200に対して、 スケールの値1を掛けたものが
結果として表示されます。
スケール.Xが、0.5の場合、
結果を表示する前に、 サイズの値に0.5を掛けます。
それにより、立方体の見た目が変わりましたが、
オブジェクトタブを見てみると、 サイズ.Xは200のままです。
属性タブに戻り、 スケールをゼロから拡大させたい場合、
スケールの各欄に0を入力すると、 オブジェクトが見えなくなります。
しかし値を1に戻すと、 オブジェクトは通常サイズに戻ります。
これをアニメ化させるには、 キーフレームを2つ作る必要があります。
それでは、基本のスケールの作業をやってみましょう。
作業するためにはオブジェクトモードに切り替えます。
これで直接スケールツールを使って、 スケールの倍率を変えられるようになります。
それぞれのモードを、どのように選び、 いつを使うべきなのでしょうか。
簡単に判断できる方法は、作業がモデリングするか、 アニメーションの作成かということです。
モデリングやシーンの作成であれば、
通常オブジェクトの実際のサイズを 変更したいはずです。
ですので、オブジェクトの実際のサイズを 変更するモデルモードを使います。
スケールが影響するようなアニメーションの 作成をしたい場合は、
元のサイズにオブジェクトを 簡単に戻せるようにしたいので
オブジェクトモードを使います。
では、それぞれ異なるモードで、階層を持ったものを スケールさせた場合どうなるか見てみましょう。
この場合は、シンプルなジェネレータの スイープを使った例をご覧ください。
これはジェネレータの組み合わせで、円形スプラインは プリミティブオブジェクトの1つで
スプラインは、ポイントオブジェクトになります。
モデルモードにして、 軸をドラッグしてスケールさせます。
そうすると、異なる結果になったと思います。
プリミティブスプラインは、 常に各軸が独立してスケールされます。
独立したスケールは、本来すべての プリミティブオブジェクトが持っています。
独立してスケールさせるには、 軸を気にする必要はありません。
属性マネージャを見てみると
毎回、スイープをさせても、 円形の半径が影響されているのがわかります。
スプラインオブジェクトは、ガイドとして使われている ポイントオブジェクトです。
つまり、ポイントがシーンに存在しているので、
スケールができるのです。
Y軸でもX軸でもスケールできます。
しかし、このオブジェクトは奥行きがないので、
Z軸を変えても何も変わりません。
0に何を掛けて0ということです。
モデルモードで、ジェネレータをスケールすると、 同じ変形がスイープの子に対しても適用されます。
各子供は、それぞれのオブジェクトタイプに 制限されます。
オブジェクトモードに切り替えて、 同じことをすると、
スイープのスケールが替わります。
この場合、あなたが意図した通りに オブジェクトがスケールされ、
一つの軸に沿ってすべてがスケールされます。
一つ大きな違いがあります。
モデルモードを使うときに、 円形スプラインの半径が変更されています。
この場合、同じ状態のままで
円形スプラインの座標タブを確認すると、 スケールされているのがわかります。
ここでは、値は1のままです。
しかし、円形スプラインは間違いなく大きく、 スイープにのみ残されています。
スイープの座標タブを確認すると、 スケールが変更されています。
つまり、親やルートオブジェクトのスケールは、 子オブジェクトにも自動的に反映されます。
これは、子供に直接影響する モデルモードでのスケールとは異なります。
次に移る前に別の例として、
同じようにポリゴンの立方体を ヌルオブジェクトの下にして
ヌルのスケールを50%にしてから、
立方体を階層から外しても 立方体は変化しません。
これは、スケールが立方体に 直接適用されているためです。
オブジェクトモードでヌルをスケールして、
立方体を階層から外すと、 立方体の見た目の大きさは保持されています。
しかし、立方体のスケールを見てみると、 親に適用されたスケールが残るのがわかります。
これはスケールされた階層から立方体を動かした時に 急にサイズが変わらないように適用されています。
では、ここで実際にいろいろ試してみてください。
それぞれのモードの時に、オブジェクトの種類によって スケールツールでどんな変化があるかお試しください。
もし、なにか別のプロジェクトファイルを 使ってみたい場合は、
navigation_figure_c01.c4dを開いてください。
十分理解できたら、次のビデオに移りましょう。
Neste vídeo você irá aprender a segunda parte da interação de objetos,
que é a transformação.
Isto, porém, não é tão legal quanto o nome faz parecer,
mas é uma destas operações que são fundamentais quando se trabalha com 3D.
O transformação no contexto de uma aplicação 3D
é qualquer tipo de movimento, rotação ou dimensionamento executado em um objeto.
Então, transformação significa simplesmente a mudança de uma posição, dimensionamento ou rotação
para uma nova posição, dimensionamento ou rotação.
Ela pode ocorrer ao longo de um período de tempo no caso de uma animação, ou como uma interação do usuário.
Então como você transforma um objeto?
É aqui que você começa a utilizar as ferramentas de transformação, ou simplesmente, Move (movimento), Scale (dimensionamento) e Rotate (rotação).
Quando um objeto está selecionado e qualquer uma das ferramentas de transformação estiver ativa,
você pode ver os eixos do objetos, exibidos em forma de alça ou faixa.
Estes eixos podem fazer algumas coisas.
Primeiramente, eles mostram a orientação local dos objetos.
Segundo, eles demonstram em qual modo você está e,
terceiro, eles permitem restringir uma transformação para um eixo específico.
Quando a ferramenta Move está selecionada, você vê cones no final das alças de cada eixo,
enquanto que a ferramenta Scale tem cubos no final das alças.
Por último, a ferramenta Rotate da acesso a faixas que circulam cada eixo do objeto.
Cada alça ou faixa tem uma cor específica que representa qual eixo ela controla.
Neste caso, vermelho, verde e azul ou X, Y e Z.
Não importa qual ferramenta de transformação você ativou,
quando você posiciona o mouse sobre um eixo, ele será realçado.
E se você clicar e arrastar estes controles, a operação de transformação será efetuada sobre ou entorno do eixo escolhido.
Ao clicar e arrastar sobre o eixo verde, você vai mover o objeto pelo eixo Y,
ou, no mundo do Cinema 4D, para cima e para baixo.
Ao clicar e arrastar sobre o eixo vermelho, você irá mover o objeto pelo eixo X,
ou para esquerda e para a direita.
E por último, ao clicar e arrastar o eixo azul, você irá mover o objeto pelo eixo Z,
ou pra frente e para trás.
Ao movimentar o objeto, preste atenção no que acontece no Coordinate Manager,
já que ele atualiza os valores conforme você altera eles.
É interessante aprender a relacionar os movimentos que você faz no viewport com o que acontece neste gerenciador,
já que isso o ajudará a ter um melhor entendimento do espaço em que você está trabalhando.
A ferramenta Scale parece ser a próxima escolha óbvia para testarmos,
se você seguir a ordem dos ícones da esquerda para a direita.
Mas como o funcionamento dessa ferramenta altera baseado no modo e no tipo de objeto selecionado, vamos ver primeiro a ferramenta Rotate.
Com a ferramenta Rotate, você clica e arrasta em uma faixa do eixo que você quer rotacionar em volta.
Isso significa que se você clicar e arrastar no eixo verde, você irá rotacionar o objeto ao longo do eixo Y.
Se você clicar e arrastar o eixo vermelho, você irá rotacionar o objeto ao longo do eixo X
e se você clicar e arrastar o eixo azul, você irá rotacionar o objeto ao longo do eixo Z.
Se você prestar anteção ao Coordinate Manager, existe uma coluna para Rotation, mas não temos X, Y e Z.
Ao invés, temos H para Heading, P para Pitch e B para Bank.
Apesar destes termos virem da Aeronáutica e terem um papel importante no funcionamento
das funções do Cinema 4D, na maioria das vezes, você pode ignorá-los.
Eles são apenas uma forma diferente de representar as rotações em um espaço.
A explicação mais simples é, o Heading ou H representa uma rotação em torno do eixo Y,
ou uma rotação que segue a faixa de eixo verde.
O Pitch ou P, é a rotação em torno do eixo X ou rotação que segue a faixa de eixo vermelha.
E o Bank ou B, representa a rotação em torno do eixo Z,
ou a rotação que segue a faixa de eixo azul.
Resumindo, apenas se lembre que H é a rotação em torno do eixo Y,
P é a rotação em torno do eixo X
e que B é a rotação em torno do eixo Z.
Você vai precisar de um tempo para se acostumar, mas é importante que o faça.
Caso você queira trapacear,
você pode sempre olhar no Coordinate Manager para verificar qual atributo você está modificando.
Finalmente temos a ferramenta Scale
e ela é um pouco diferente porque a forma como ela funciona pode mudar dependendo das circunstâncias.
Na primeira vez que uma pessoa tenta dimensionar um objeto primitivo, ela clica e arrasta na alça do eixo,
esperando que o dimensionamento ocorra apenas neste eixo.
Ao invés disso, todo o objeto é dimensionado. Isto não é o que esperávamos, mas tampouco é um erro.
O que ocorre é que temos duas coisas diferentes acontecendo.
A primeira é a forma como funciona um objeto primitivo e
a segunda é o valor que está sendo alterado.
Neste exemplo, vamos ignorar por um momento que o cubo está dimensionando em todos os eixos.
Dentro do Cinema 4D, um objeto tem duas propriedades que definem o seu "tamanho" visual.
A primeira é o tamanho real,
e ele é em absoluto, definido por uma calculação interna no caso de um primitivo,
ou baseada na posição atual dos pontos no espaço,
no caso de algo como um objeto poligonal.
Temos também o atributo Scale, que é basicamente um multiplicador usado para ajustar o tamanho visual em relação ao tamanho real.
Primeiro, vamos checar qual o modo atual de seleção na paleta da esquerda.
Temos que ter selecionado o modo Model (modelo).
Este ícone também nos informa que temos aqui uma paleta flutuante.
Se você clicar e segurar no ícone, dois modos diferentes vão aparecer,
o modo Model e o modo Object.
Ambos os modos permitem que você controle o objeto como um todo e
as funções de movimento e rotação funcionam igual.
Isso deixa a ferramenta de dimensionamento.
Ao selecionar um destes modos, você está escolhendo se você vai transformar o atributo Size de um objeto,
no caso do modo Model ou o atributo Scale de um objeto, no caso do modo Object.
Vamos usar este cubo primitivo como exemplo.
Neste caso, quando você dimensiona o cubo no modo Model,
você está afetando o atributo de tamanho do cubo.
Podemos confirmar isso ao olharmos para os atributos do cubo no Attribute Manager.
Portanto, se você quiser animar o dimensionamento, você tem que animar o tamanho/Size.
E isso significa que um simples dimensionamento teria que ir de 0 a 300 ou 200 ou qualquer tamanho que você possa querer que o cubo possua.
Mas o mais problemático é que, já que o valor original do cubo não fica salvo em lugar algum,
se você precisar voltar ao tamanho original,
você tem que anotar qual era o tamanho inicial do cubo em algum lugar por conta própria.
Apesar disso, animar estes atributos não está completamente errado,
já que existem muitos motivos pelos quais você poderia querer animar o tamanho de um objeto paramétrico.
O outro estranhamento que as pessoas tem em sua primeira experiência com o dimensionamento é que os objetos primitivos apenas se dimensionam uniformemente.
Os objetos primitivos são apenas pontos no espaço,
eles não possuem um tamanho real.
Então apenas a matemática que acontece dentro do programa para criar este objeto primitivo é dimensionada.
E essa característica é algo específico de objetos primitivos.
Agora se o objeto for alterado para editável (Make Editable),
você pode dimensioná-lo ao longo de qualquer eixo,
mas essa transformação está de fato afetando os pontos do objeto e,
apesar de ser muito útil, ela também é destrutiva. Portanto
você precisa ter um plano de modelagem,
salvar cópias incrementais ou duplicar os objetos conforme você modela.
Pelo menos dessa maneira você tem alguma referência da forma original para checar se necessário.
Podemos dizer então que seria conveniente termos uma forma de evitar que isso aconteça, correto?
Bom, se quisermos alterar o tamanho visual de um objeto,
e ainda mantermos o tamanho original dele salvo em algum lugar,
então precisamos utilizar o dimensionamento do atributo Scale.
Com um objeto selecionado, você pode notar que no Attribute Manager, temos uma aba de Coordinate (coordenada).
Esta aba é um pouco diferente do Coordinate Manager.
Primeiro, os valores mostrados são sempre a Position e a Rotation locais
e segundo, é sempre mostrado o atributo Scale do objeto e não o atributo Size.
O atributo Scale neste contexto é um multiplicador do tamanho real do objeto, o que significa
que se o atributo Size de X na aba Object é de 200, então o atributo Scale vai multiplicar esse valor por 1
e então exibir o resultado.
Se você alterar o atributo Scale de X para 0.5,
isso significa que o atributo Size de 200 será multiplicado por 0.5 (pela metade) antes de exibir o resultado.
Apesar dessa operação alterar o cubo visualmente,
se você olhar a aba Object, você pode ver que o atributo Size de X continua em 200.
Como antes, se você quiser sumir com o objeto, você entra um valor de 0
em cada campo do atributo Scale e isso fará com que o objeto desapareça. Mas ao colocar
o valor de 1 novamente, o objeto volta ao seu tamanho normal.
Para animar, precisamos apenas de alguns Key Frames (quadros chave).
Realmente parece que estamos tendo muito trabalho para uma simples operação de dimensionamento.
mas felizmente é aqui que o modo Object nos ajuda, já
que ele permite alterar o atributo multiplicador Scale diretamente ao usarmos a ferramenta de dimensionamento.
Então ... como você escolhe qual modo utilizar?
Talvez a maneira mais simples de entender é pensar: estou modelando ou estou animando?
Quando você está modelando ou criando sua cena,
você geralmente quer editar o tamanho real dos seus objetos.
Neste caso, use o modo Model que permite a você alterar o tamanho real do objeto.
Mas quando você estiver animando, você geralmente quer utilizar o atributo multiplicador Scale,
já que assim você pode facilmente retornar ao tamanho real de um objeto.
Neste caso, utilize o modo Object.
Vamos agora ver o que acontece quando você dimensiona uma hierarquia utilizando os dois diferentes modos.
Para este exemplo, uma simples configuração de geradores como o Sweep proporcionará um bom exemplo,
já que ele oferece uma combinação de um gerador, um objeto Spline de círculo, que é um tipo de objeto primitivo
e uma Spline, que é um tipo de objeto Point (de pontos).
No modo Model, se você clicar e arrastar em cada um dos múltiplos eixos para dimensionar,
você terá resultados diferentes,
mas a constante é que a Spline círculo primitiva está sempre dimensionando uniformemente.
Lembre-se que este dimensionamento uniforme é uma função exclusiva de todos os objetos primitivos.
Não importa em qual eixo você dimensione, ele sempre dimensionará em uniformidade.
Se repararmos no Attribute Manager,
podemos ver que a cada vez que dimensionamos o gerador Sweep, estamos afetando o raio do círculo.
Já o objeto Spline usado como guia é um objeto Point.
Isso significa que o que realmente existe na cena são pontos
que neste caso podem ser dimensionados no
eixo Y ou no eixo X.
Mas como o objeto não possui nenhuma profundidade,
não existe alteração aparente no eixo Z.
Lembre-se, zero multiplicado por qualquer coisa ainda é zero.
Então quando você dimensiona o gerador em modo Model, ele está tentando aplicar a mesma transformação para o resto da hierarquia do Sweep
e cada filho da hierarquia está respeitando as limitações próprias de seu tipo de objeto.
Ao mudarmos para o modo Object e tentarmos a mesma operação,
estaremos afetando o atributo Scale do Sweep.
Neste caso, você pode dimensionar o objeto como esperado,
já que tudo é dimensionado junto ou ao longo de um único eixo.
Mas existem algumas grandes diferenças aqui.
Ao usar o modo Model, o raio do Circle Spline mudou,
mas aqui ele se manteve igual. E se você
checar a aba Coordinate da Spline círculo, podemos ver se o atributo multiplicador de Scale foi aplicado.
Neste caso, ele ainda está configurado para 1,
mas a Spline círculo é definitivamente maior, então só sobra checarmos o Sweep.
Na aba Coordinate do gerador Sweep, podemos ver que o atributo Scale foi alterado.
Isso significa que o atributo Scale do objeto raiz ou pai da hierarquia afeta os seus filhos automaticamente.
Essa característica é diferente do modo Model, que afeta os atributos dos filhos da hierarquia diretamente.
Vamos ver mais um rápido exemplo antes de continuarmos.
Mesmo algo simples como um cubo poligonal dentro de um objeto Null,
se você alterar dimensionar o Null para 50% e então
remover o cubo da sua hierarquia, você pode ver que o cubo não mudou.
Isso acontece porque o dimensionamento é aplicado diretamente no filho (cubo).
Agora, se você dimensionar o Null usando o modo Object e então
remover novamente o cubo da hierarquia, o cubo mantém o mesmo tamanho visual,
mas se você olhar o atributo de Scale do cubo, você pode ver que ele herdou a Scale que você aplicou ao pai da hierarquia.
Isso acontece para que se por algum motivo você remover o cubo de uma hierarquia dimensionada, ele não mude repentinamente de tamanho.
Gaste um tempo agora para exercitar estas funções
e tente se acostumar em como diferentes objetos são afetados pela ferramenta Scale nos diferentes modos.
Se você quiser um projeto para trabalhar,
abra o arquivo "Navigation Figure C01" que foi usado nos vídeos anteriores
e assim que você se sentir confortável, comece o próximo vídeo da série.