Party Bot, Part 02: Model a Simple Robot out of Primitives with the Position, Scale, and Rotate Tool
Share this video
Model a simple robot character using cubes, cylinders, cones, and capsule primitives. Topics covered include:
- Adding simple shapes to your scene.
- Moving, Rotating, and Scaling those shapes.
- Adding roundness to hard corners with the Fillet option.
- Easily duplicating with the Ctrl + Drag shortcut.
- Using the 4-way view panels to accurately position objects in 3D space.
- Using Screen Space Ambient Occlusion to make it easier to position objects on top of each other.
Transcript
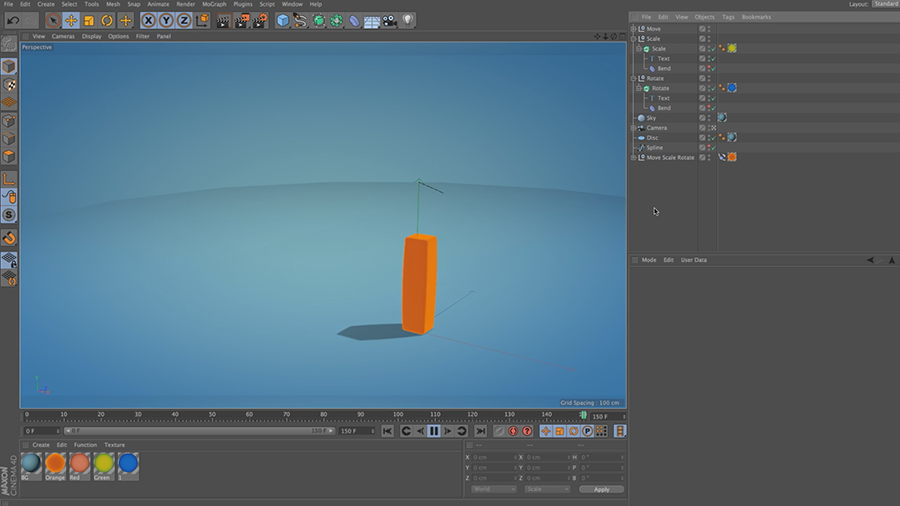
In this video, we're going to model a simple character by using some primitive
shapes and Cinema 4D's manipulation tools. To begin, go ahead and create a new
project file. When you first start Cinema 4D, you're going to see an empty viewport
like this, which is a view into our 3D scene, and we want to start by adding in
the body of our character. And for that we've got a number of different shapes
that we can select from, and I've opened this palette just by clicking and holding
on this cube that you see here. And what I want to do to start is grab a cylinder to
be the torso of my character. And now that it's added to my scene,
you'll see that I have these orange dots on the top and in the corner right here,
and if you click and drag right on that dot, you'll be able to resize the shape.
And now that I've done that, I can also click and drag this outer dot and adjust
the width. Maybe I want to make it a little bit wider than it is tall.
And as I look at this, the edge is very sharp.
So I'm going to add in what's called a Fillet. And the Fillet right here can be
found in the Caps tab of the Attributes Manager. So I just want to click to turn
that on. And as I do this, you'll see that I get an additional orange dot, and as I
click and drag that dot, you'll see that the radius value here in the Attributes
Manager is changing, and I can also change that myself right here.
So we've created the torso. Let's go ahead and create a head to put on top of this.
So to do that, I'm going to add a cube to my scene just by clicking on this object
right here. Now, the cube is quite large by default and it's completely overwritten
the object that's below it, and if I click and drag out here in space you'll see that
I can reveal the object below. Now, I didn't really want to do that so I'm going
to hit Undo right up here, or Cmd+Z on my keyboard. Now, in order to model most
effectively, especially when I'm just starting out, I would recommend using the
four-way view, and you can get that by clicking on this icon in the upper
right-hand corner of your viewport. And what this gives you is a peek into your
scene from a number of different views, kind of like a blueprint.
So we have our top, front, and right views here. And what I want to do is take my
cube and move it up on what's called the Y axis, this green one right here,
by clicking and dragging so that it's just above the top of my cylinder.
And now I'm going to take my Scale Tool by clicking right here and then I'm going to
click and drag to scale this down. Now, as I'm clicking and dragging, I want to point
out that I'm not grabbing the handles right here, which can sometimes have the
effect of only scaling or moving in one direction, and I'm also not clicking in
the center of my object.
Even though that's very intuitive to do, it doesn't give you the result that
you'll want. So I'm going to hit Undo because I didn't want to do that
and I just want to scale this maybe up a little bit. I want to have a nice, large
sort of cutely-proportioned head. Next, what I might want to do is frame up
my objects so I can see them all a little bit more clearly. So if I hover my cursor
over a viewport, I can tap the H key on my keyboard to frame all.
I can also go to View, Frame All, or View, Frame Geometry, or I can use my view
manipulator buttons up right here to move, dolly, or rotate around.
So I'm now looking at my object from a number of different perspectives and I can
see that the edges of my cube are much sharper than the body. So I'm going to
grab my cube object by clicking it right over here, and in the Attributes Manager,
all of its settings come up, and again we see this Fillet option, which is going to
allow us, once we turn it on, to round our shape, and you see that we also get these
control dots, again, to modify that shape right there. So I've got my head,
I've got my body, let's go ahead and add in some arms. So I'm going to add in a
capsule object, which is kind of like a cylinder, but it's round at the tops and
at the bottoms by default. So I'm now going to go into my front view here and
dolly out a little bit by clicking and dragging on this second icon, and now I
can click and drag, move this over, make it a little bit skinnier,
and you'll notice that I can also click right here. Right in the middle of this
green arrow is that orange dot and that will allow me to resize this.
So just by grabbing these values right here, I can kind of adjust these lengths.
Maybe I want it just a smidge taller. There we go. So that's one of my arms.
Now, I want to have two of these, and there's a few different ways I can
accomplish this. I can select my object in the Objects Manager and then go to Edit,
Copy, Edit, Paste, and that's created another copy of it in the exact same
position, and now that's done I can click and drag over on this X axis to move it
over, or I could just sort of freehand it if I wanted by clicking around.
I don't want to do that, so I'm going to hit Undo. Next, I'm going to want some
legs and I'm going to show you another method for copying, and that is to hold
down the Ctrl or Cmd key on your keyboard and then click and drag.
And this is going to allow me to position this leg down here below.
Now, I'm going to want to adjust the height on this just a little bit.
So he's got slightly stubby legs, and I'm going to take this capsule and I'm going
to duplicate it again, and this is actually going to become a shoe.
And let me show you how that's going to work. I'm going to go to my four-way view
and right now I've got...this object is visible in some of my views,
but not all of them, and there's a cool keyboard shortcut you can use,
which is Alt or Opt+H, which will frame all of your
objects and all of your views simultaneously.
And now that I've done this, I've got this foot that I can see from the side and I
want to change its orientation. Now, I can do that a couple of ways.
I can go into the Orientation option right here and change it from +Y to +Z and that
means it's aligned with this blue or Z axis here like this. If I want,
I could have also come in here with my Rotate Tool and clicked outside of this
gray circle and rotated it or grabbed this red band so that I rotate it very exactly,
but I don't want to do that. So I'm now going to go back, take my Move Tool,
and position it so it lines up. Not just in this first view, but also in the front
view and the general rule of thumb is that if an object is lined up so that it looks
like it's in the right position in two of these flat, or what are known as
orthographic views, then your object should be doing pretty well.
And now I'm going to make it a little bit shorter and line it up again, and as I
go into my 3D view and rotate around, and I'm going to do this by holding down my
Alt or Opt key as I click to drag and rotate, and middle-mouse-click to pan.
I notice that the feet are not very flat, so what I want to do is take this capsule
and then go to the Slice section, and inside this tab, I have the option to
slice or cut off a portion of the object, and right now it's cut off the bottom and
I can adjust these from and to angles, or if I hit the Object tab I can try instead
of +Z I can try -Z and see if that inverts it, which it does.
So now I can again go into my four-way view and reposition this object, and here
we are. I've got two arms and then one leg. Now I can select this foot as well as
the leg by holding down the Shift key as I click. The same can be done in the Object
Manager, so click and hold down Shift. And now I want to duplicate this
and move it over to the side. So first I'm going to move it over a little bit this
way in the front view and then I'm going to hold down my Ctrl key and then click
and drag and move it to the opposite position. So now I have legs,
arms, and a head, but I don't yet have a face or a facial expression on this guy,
and for that I'm going to use the same technique of adding in a shape and then
duplicating it. So let's first add in a cylinder to form the white of the eye.
So I'm going to grab a cylinder and it got added, but it sort of, again, got added in
the wrong position and sort of the wrong size. So I'm going to go into my four-way
view and I'm going to move it up so that it's centered in my head right here, and
then I'm just going to take my Scale Tool and click and drag out in space to scale
it down.
Now, it's quite a bit smaller, but it's in the wrong orientation.
So I'm going to select my cylinder object and change the orientation here to -Z and
now we see it's facing forward, and if I stick it out like so, we get these sort of
telescoping eyes, and what I want to do is just adjust the height.
So I'm going to reduce this down a little bit and drag that into the head.
Now if I want, I can also come in here and add a little bit of rounding, and again,
rounding is going to be that Fillet or Filet option. So if you click on that,
you can just add that and adjust it ever so slightly, maybe move it back.
And right now I'm having difficulty positioning this so I know that it's
intersecting my object and there's a great viewport feature that you can turn on
called screen space ambient occlusion, and you can get that by going to the Options
pull down right here and choosing SSAO, screen space ambient occlusion.
And basically, this just adds a little shadow wherever your objects are close to
touching each other. And this will allow you, as you move it away, to see when your
object is starting to pass through into another object. And I've got my sort of
white of my eye, I'm going to duplicate this and move it out and I'm going to move
it out on the Z axis, and I'm going to click and drag to do that. Now, if I just
click and drag and move in the viewport like this, you'll see that it gets a
little bit out of line.
So I'm going to hit Undo and I'm going to hold down Ctrl and drag it out by
grabbing this blue handle right here and we'll see it's moving just in one
direction, and you can verify that in your four-way view. And then in my front here
I'm going to reduce the radius so it's sitting in the middle of my eye, and if
you're finding it hard to make a fine adjustment, you can hold down the Alt or
Opt key as you adjust a radius, for example, and you'll get instead of moving
one unit at a time, you'll move .1 units at a time.
And I'm now going to tweak the height on
this just a little bit to bring it down, bring it out, and again, that screen space
ambient occlusion is really helpful in terms of placing that more exactly.
So to get my other eye, I'm just going to select this one and the other one right
here by holding down Shift, or I can click off in space to deselect and I can
right-click and drag to quickly select. And I'm now going to go into my front
view, hold down my Ctrl key to copy, and I'm just going to drag it over so that
they're roughly opposite of each other. And I now have the basics of my character.
I would like to just add in a little line for a mouth and a little party hat.
So to add that line, I'm going to add in another capsule. This one I'm going to
make much smaller so I'm going to scale it down, and I want it to be horizontal.
So for that, I'm going to go in and change my orientation from +Y to +X, and after
having done that, I'm just going to make it a little bit skinnier,
go into my four-way view and sort of exactly place that. And if I want I can
just right-click and drag to select these and tap the H key to frame everything or
the S key to frame what is selected, and that'll make it much easier to see that
head right there. Last but not least, let's add in a little party hat for him.
So I'm going to add in a cone, and this cone I'm going to move on top of his head.
And right now it's quite large, so I'm going to scale that down,
set it on top, and maybe move it a little bit askance off in a corner like this and
just tap the H key one more time to frame up everything. Now, it's also a good
practice to save your project files as you work on them and the first time you save a
project file, I recommend going to Save Project With Assets, and that'll create a
folder for your project. So I'm just going to save this in my folder right here and
I'm going to call this PartyBot. And now if I want to save again, I can just go to
File, Save, or even the Save Incremental, and what that's going to do is increment
the file name every time I save, and that's just a good practice to get into.
All right, in this video, we created a simple character by adding primitive
objects for a scene, we manipulated them with the Move, Scale,
and Rotate tools, and we also paid careful attention to that Fillet option for adding
a bit of rounding to our shapes.
Related

Getting Started with CINEMA 4D R15, Part 07: Introduction to Primitive Objects and Deformers
Getting Started with CINEMA 4D R15, Part 05: Introduction to Transforms (Move, Scale, and Rotate)
Cinema 4D Lite Reference: How to Move, Scale and Rotate Objects